Install Debian Linux on VirtualBox
The first step to practice learning Linux or even building your own lab is to install Linux on a virtual machine.
Here we are going through every step, so we can have a new freshly installed Debian Linux on our machine.
Step 0: Install VirtualBox
The easiest way to get an installer for Oracle VirtualBox is to search its name on your favorite search engine. normally the first link is to https://www.virtualbox.org/. Or simply enter this address on your browser.
On the landing page, you will find a big blue button. Clicking on it will take you to another page which you will find a bunch of links.
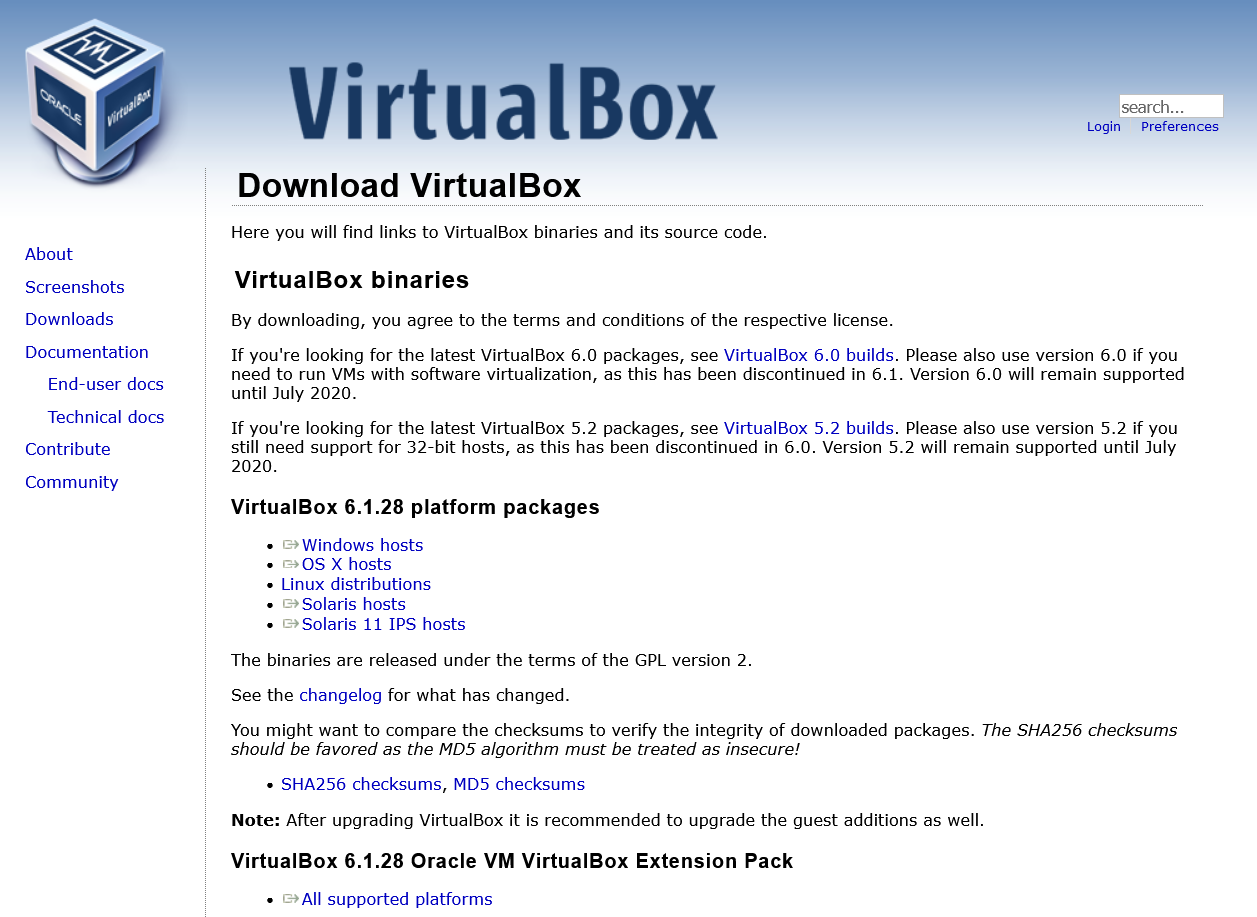
As you can see, there are different links for each platform. You can download your installer based on your desired platform.
For example, if you are using the Windows platform, you can click on the 'Windows hosts' link and download an installer compatible with Windows platforms. After your download is finished, just run it and the installation process starts.
Installation steps:
- On the first page, you can select installation options and also the location of your VirtualBox. Normally I keep all the default options.
- The next step is about creating desktop or start menu shortcuts. Change them as you wish.
- In this step the installer is asking you to add some network interfaces, which you will need later, to connect your machines together. Just accept it.
- The installation is finished :)
Now your Oracle VirtualBox Manager is installed and you can run it after clicking on Finish.
Step 0.1: Install VirtualBox Extension Pack
VirtualBox Extension Pack is one of the necessary extensions for VBox. It enables support for USB 2.0 and USB 3.0 devices, VirtualBox RDP, disk encryption, and some other important features you can use on your virtual machines.
To install it, go back to the VirtualBox download page. You can find the link to it under Oracle VM VirtualBox Extension Pack. Download it and then run it. Normally the VBox will detect it and will alert you about installing it. But If you could not run it, simply drag it onto the Virtual Box Manager window.
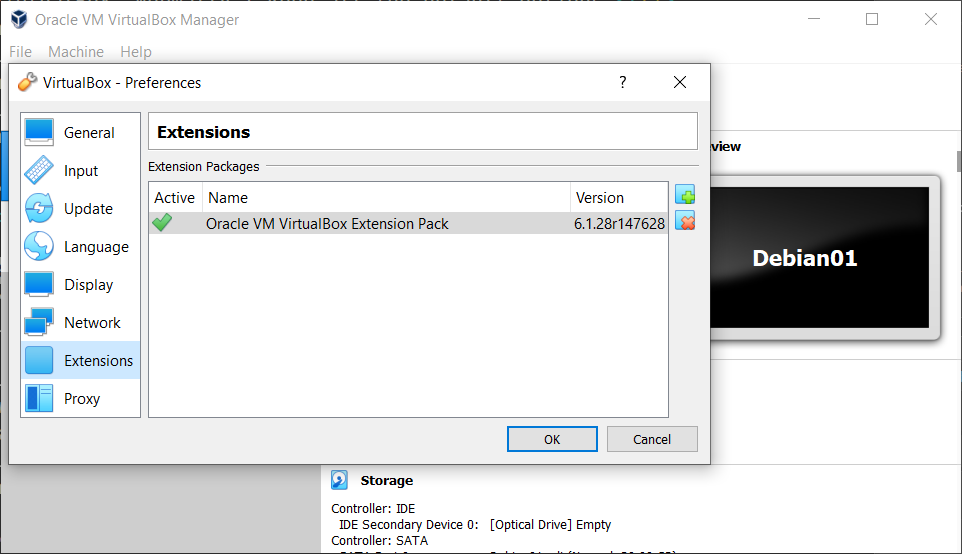
After aggreeing to install it, you can check it in the 'Preferences...' Menu and then the 'Extensions' tab.
Step 1: Create Your First Virtual Machine
With these steps you can easily create your first virtual machine:
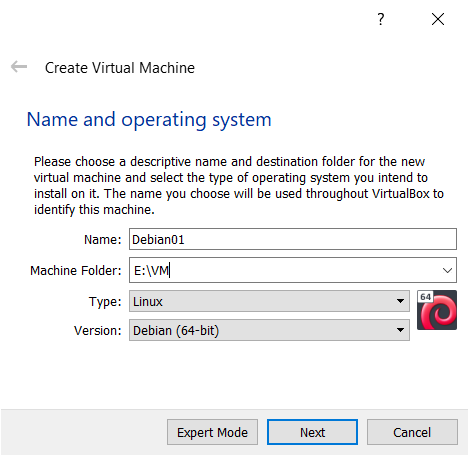
- Click on the New on main menu
- Enter Name and Location of your VM. The 'Type' field should be Linux and set the Version to Debian (64-bit)
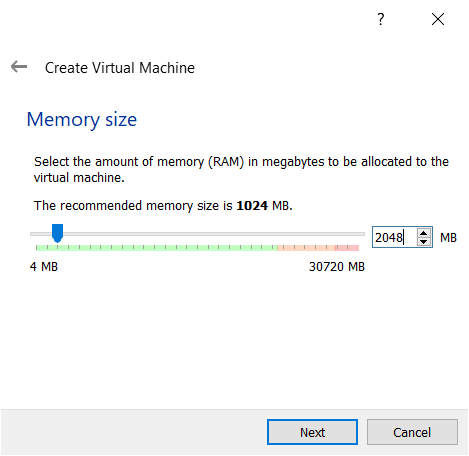
- Here you can choose the amount of memory for your machine. 2048 MB should be enough.
- This steps asks you to create a new hard disk or use an old one. just select 'Create a virtual hard disk now'.
- The format of hard disk should be 'VDI'.
- And since we don't want to lose a lot of space at the beginning, we choose 'Dynamically allocated' option which will increase the disk space based on its need.
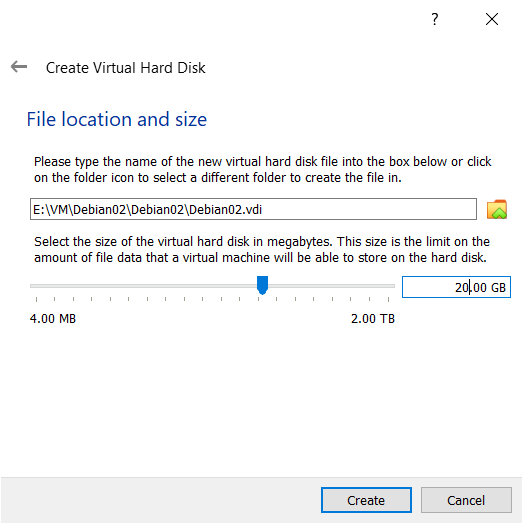
- And finally the location and the volume of disk.
Step 2: Install Debian Linux
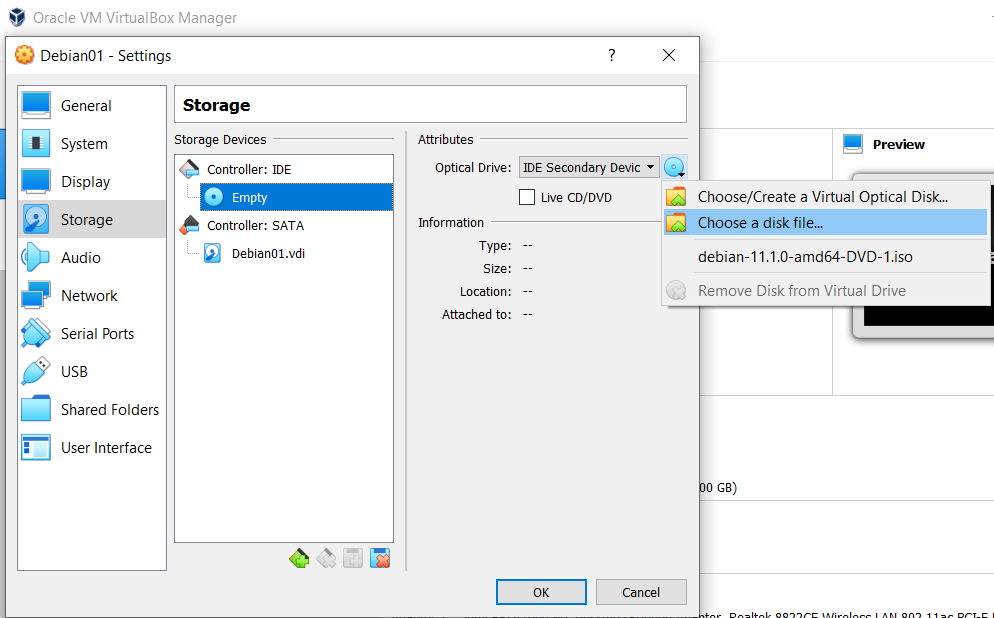
To start the installation we need a Debian Linux image file or disk. We can download the latest version of the Debian Installation disk from https://cdimage.debian.org/debian-cd/current/amd64/iso-dvd/. There you will find a file named debian-x.x.x-amd64-DVD-1.iso which shows an image for Debian prepared for DVD.
Go to your virtual machine's setting and click on 'Storage'. There you will find an option to choose a disk file for optical drive. Click on it and choose your downloaded image file.
Now you can start the VM just by clicking on the 'Start' button on the main menu. And you can see that it will automatically start the installation process.
- The first page asks you about the way you want to use the disk. We are going to choose 'Graphical Install'.
- First pages of installation is about choosing the language and the region.
- After some autoconfiguration you will see the network configuration page. First it asks you about the hostname of your machine. The second page asks you about your machine's domain name.
- The next section is about configuring users on the machine. First, you will be asked about the root password. Enter the desired password and repeat it on the next field.
Then you can create a new user by entering a name, username, and password on the next pages. - On the Clock page, you can simply configure your timezone.
- The Partition Disks page gives you the option to choose how you are going to use the defined disk on VirtualBox. The simplest option which is great for a VM is Guided - use entire disk. On the next pages, you can choose if you want to create separate partitions for each main directory or just implement all files in one partition. The 'one partition' is recommended for this section. And finally, approve the changes to the disk.
- On Configure the package manager page you can choose if you want to add different media to your package manager repository list. These media could be another disk or a network mirror.
- You can choose your desired desktop environment and some preinstalled applications on the Software selection page.
- Finally, the installation is asking you about installing the GRUB boot loader on your disk.
Now we have a fresh installed Debian on our VM. :)